

How Hard Is It To Install Over The Range Microwave
Dan is a licensed electrician and has been a homeowner for 40 years. He has most always done his ain repair and improvement tasks.
How to install a microwave over your stove or oven range
JOSBRA design via Unsplash
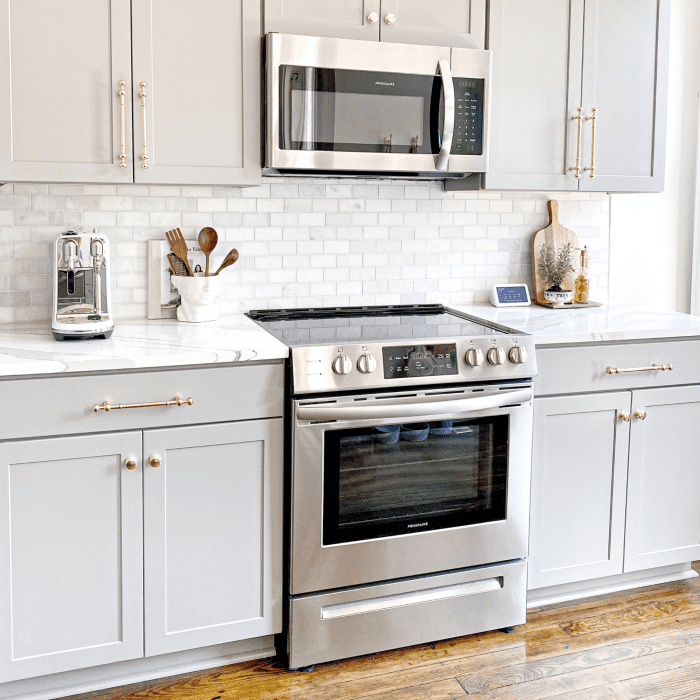
Do You Want to Put a Microwave Over the Stove?
Most of the time, installing an over-the-range microwave oven is non difficult, but each house is dissimilar, and problems can exist encountered. This article is designed to encompass some of the potential problems that may exist found as well as give basic instructions on how to install an over-the-range microwave oven.
The descriptions and photos are from the tertiary over-the-range microwave oven I've installed in contempo months, with the work existence washed this time in an older home. Older homes oft present the most problems, from electrical to cabinetry, and some of those problems and the solutions to them are presented hither.
Fifty-fifty with the problems encountered, the task of installing the over-the-range microwave was non difficult and took about 2 hours to attain. All iii of the units I've installed came with adept descriptive instructions, and all three were very like in installation procedures. The work is well inside the capabilities of near homeowners.
Footstep-by-Step Over-the-Stove Microwave Installation Guide
- Make sure you have plenty space. Microwaves are normally xxx" wide, and you'll need at to the lowest degree xv" clearance from the bottom of the microwave to the range.
- Remove the old fan, bold in that location was one. Plough off the power earlier yous practise whatever electric piece of work.
- Determine what electrical piece of work y'all might need to practise. (Is there a plug? Meet instructions beneath.) Again, make certain the power is off earlier you practise any electrical piece of work.
- Install a support or shelf for the microwave.
- Install the microwave.
- Adjust the blower motor.
Read on for detailed instructions and tips for each of these steps.
Problems You May Encounter: Incomplete or Missing Electric Connections
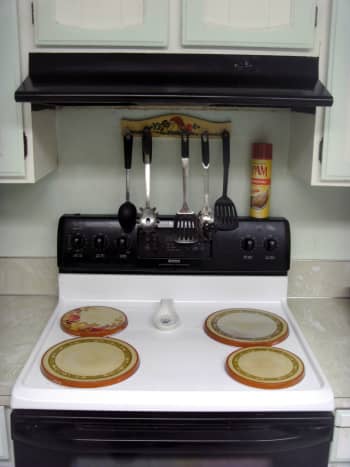
The task began with the removal of the quondam range fan unit of measurement, mounted in the place the over-the-range microwave oven was to occupy. The abode I worked in is about xl years onetime, and structure methods were somewhat different then.
Although the normal 30" wide microwave fit easily into the space provided by the range and cabinetry and the necessary 15" clearance from the bottom of the microwave to the range was more than than adequate it didn't accept long to find that there was no reasonable power source for installing the new microwave oven.
The sometime house had the range fan hardwired without a plug-in for the microwave, and while it is possible to wire the new microwave during the installation procedure, information technology is not the optimal solution. In such cases, the power for the range fan only pokes through the wall behind the fan, is encounter the fan and hooked up. A new receptacle is needed in the chiffonier above.
Turn the power off earlier continuing whatever further! The best method to brand sure the power is off is to use a non-contact voltage detector, but the fan lite could be turned on and the breakers turned off until the light goes off. Whatever method is used, make sure the ability is off before disconnecting the fan.
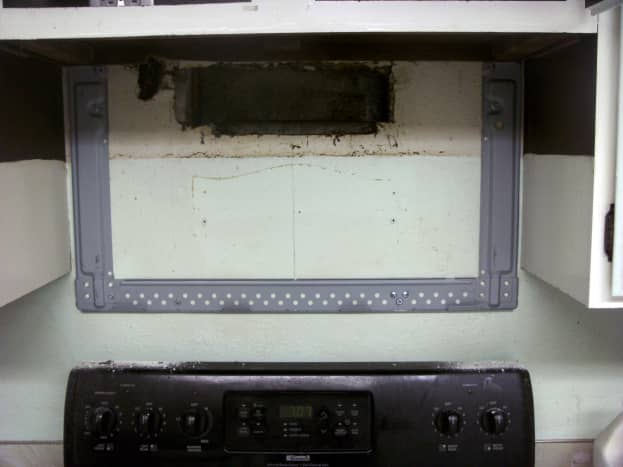
The area where the power cable comes through the wall will be subconscious past the microwave, so fifty-fifty adequately big holes in the wall won't exist of any particular concern. I found that the hole where the wire came through the wall was quite large, peradventure two" X 4"—plenty large enough to work through, and the wire was hands long enough to run college, inside the wall, and exit through the back of the cabinet only above. Information technology only needed to get upwardly a few inches, and at that place was plenty of wire to practice that.
A new hole was cutting through the back of the cabinet simply large plenty for an "old work" electrical box, and the wire easily fished into that pigsty. Before cut the hole, the general area where the plug was to get was investigated from the original hole below, and I found that there were two other wires in the area.
The plan had been to cut the hole through the chiffonier and sheetrock wall backside it with a sabre saw, but that would probably cut the wires buried in the wall, so a sheetrock saw was very carefully used to cutting the hole. A picayune more work, only it prevented damaging the wires behind the wall.
If you are not familiar with the installation or wiring of outlets, instructions are available in the link hither; exist sure to read and understand them. In particular, brand sure the power is turned off before any piece of work is done.
Whorl to Keep
Read More than From Dengarden
With the new plug-in installed and the fan removed, the work of really installing the over-the-range microwave was fix to go along.
Installing the Microwave Supports
Installing the Microwave
The get-go step in installing the new microwave is to attach the mounting bracket to the wall. The exact heart of the area is measured (in my instance xv ane/16" from each side) and a line drawn down the wall. The bracket is centered on the line and fastened to the wall.
Zipper is achieved by either using toggle bolts or woods screws. The instructions indicated that at least one wood screw is to exist used, so the studs must be located for that screw, as well as any others that might be used.
In the case here, the studs were visible through either the frazzle vent pigsty or the smaller hole where the wire originally came through the wall, but in most cases, a stud finder from your homeowner'due south toolset is very useful.
In my case, there were wooden blocks installed on the underside of the cabinet to support the fan, and these blocks extended from the front to the back under the chiffonier. The blocks resulted in the subclass existence installed just barely too high and it had to shifted just slightly downwardly by loosening the screws and pushing downwards.
The instructions point that the bracket should touch the bottom of the cabinet; I propose that it be installed perhaps 1/sixteen" or 1/32" lower downwards. It volition make installation of the microwave easier if this bracket is only beneath the cabinet instead of touching it.
Holes need to be drilled through the wall for the toggle bolts; 5/8" is the perfect size for about toggle bolts, and a spade bit makes quick piece of work of the sheetrock. The stud(s) to receive woods screws should too be predrilled every bit the large screws may split the forest and are hard to drive without predrilling the 1/16" pigsty recommended.
In my instance, I found an additional stud that could be used and so used 3 toggle bolts and 2 wood screws instead of the iii toggle bolts and i woods screw. It doesn't affect the installation of the oven and provides a more than secure support.
The cabinet bottom needs preparing as well; holes must be drilled in exact locations for screws to pass through and screw into the microwave. A paper template is provided to locate these holes; record it to the bottom of the cabinet and drill where indicated.
Holes that are 3/8" in diameter are the preferred size for the screws, while a 1 3/8" spade bit provided the hole necessary for the electrical cord to pass through that was just right for that string end. The instructions indicated a 2" pigsty for the string, but that is overly large; the smaller i three/8" pigsty was perfect.
The sides of the cabinet generally project down by the bottom of the cabinet, and in this example, a wooden block needs to be fabricated so that when it is placed under the cabinet, it is the same height as the sides are. The installed microwave will touch the bottom at the lowest point (i.e., the protruding cabinet sides), and the screws will deform the top of the microwave equally they are tightened if in that location is no surface to stop the sheet metal of the microwave from being fatigued up.
Drill the aforementioned 3/8" hole in the blocks and so the screw will laissez passer through the bottom of the cabinet and the block into the microwave. In my own case, the cake needed to exist i 1/4" thick; a typical ¾" pieced of wood coupled with a piece of ½" plywood would have been perfect, but blocks were already in place to back up the now removed fan.
Unfortunately, the holes in the lesser of the cabinet and the blocks were almost, but not quite, in the correct spot. An additional 1/ii hole needed to exist drilled; this was washed by working the drill bit up and downward with side force per unit area practical until the holes were in the correct place but elongated. The screw head nearly roughshod through the elongated pigsty, which is, of course, unacceptable.
I chose to use some big "fender" washers on top to cover the hole; these washers are over an inch across with simply a i/4" hole for the spiral to go through and thus covered the overly large hole in the chiffonier bottom and spread the weight out. Alternatively, a new simulated lesser could be placed in the cabinet, made from hardboard.
Adjusting the Blower Motor


How to Accommodate the Blower
As it came from the manufacturing plant, the exhaust blower in the microwave was installed to recirculate air dorsum into the room. The duct work to exhaust it outside was already in the wall, so information technology only made sense to use that duct, which the microwave is designed to do with a little modification.
The photo shows how the exhaust area in the microwave is closed off from the factory; the blower assembly is removed from the microwave, turned to the orientation shown in the second photo and reinstalled. It sounds much more complicated than information technology is; the entire process took less than five minutes and was very easy.
The duct in the old house was not in real skilful status and was considerably larger than the exhaust from the microwave, so foam insulation of the type used effectually doors or windows with a sticky side was used on the wall to seal the surface area.
In this mode, the back of the microwave is sealed against the wall except for the ducting, and air must go up the duct instead of around small cracks behind the installed microwave and back into the room.
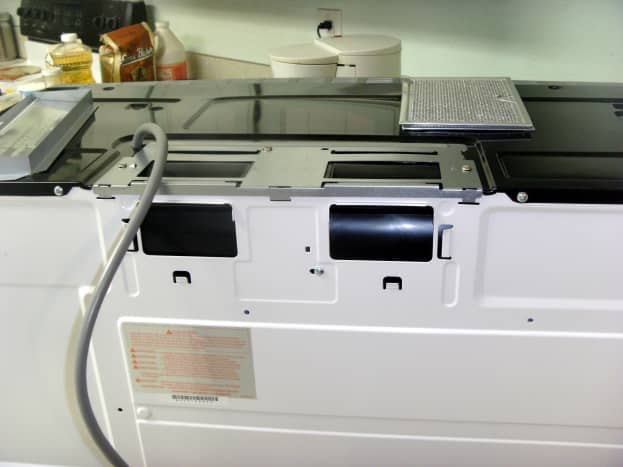
This tin can be seen in the photo above that besides shows the bolts passing through the chiffonier bottom. It is the greyness area around the duct. The insulation on paw was wide simply quite thin at nigh ¼" thick, and so two layers were used.
Installed over the counter microwave
How to Install the Microwave
- The actual installation of the microwave is quite simple: the lesser rear of the microwave is prepare onto the small hooks on the rear bracket screwed to the wall, the plug and cord fed up inside the chiffonier, and the unit tipped up into identify.
- The long screws need to be placed through the holes in the bottom of the cabinet and screwed into the microwave and the cord plugged in. My unit had three screws into the top of the microwave, with a notation that the heart one is not to be tightened as well much.
- In my case, the grease screens needed to be installed into the lesser of the microwave and the glass turntable set into place. The clear plastic film over the keypad needed to exist removed, and voila!—the unit is ready for supper.
Tools Needed
Well-nigh of the tools I used are common around the house, although I did utilize an impact driver for driving the forest screws. A cordless drill will work nearly as well, and fifty-fifty a screwdriver would do the task with a expert bargain of effort (the screws provided are quite big).
Is Information technology Easy to Install a Microwave Over a Range? How Difficult Is It?
Probably the biggest obstacle for most homeowners will be a lack of conviction, but y'all can learn to do nearly dwelling house repairs yourself. All it takes is a lilliputian time and a few of the right tools.
My own experience in installing this particular over-the-range microwave would tend to bespeak that they tin can be installed in near whatsoever dwelling. At absolute worst I would wait a new power line to have to be pulled from the circuit panel or nearby plug, and new ducting installed if there is none and the owner insists on an outside duct.
On a scale of ane–ten, this task rates most a three. My total time, including mounting the new plug, cleaning up afterward, and taking photos was about 2 hours.
This article is accurate and true to the best of the author's noesis. Content is for informational or entertainment purposes but and does not substitute for personal counsel or professional advice in business organisation, financial, legal, or technical matters.
Questions & Answers
Question: What if the existing vent to the outside and the new microwaves vent do not friction match up? At that place is an inch between the superlative of the microwave and the bottom of the cupboard.
Answer: Most microwaves must be bolted to that upper chiffonier, which means you will take to put in a minor spacer betwixt the chiffonier and the microwave. The vent must then exist extended downwardly to the microwave with some sheet metal; with merely an inch or so to get, I would propose purchasing some roof flashing and cutting and bending information technology to fit.
Question: Does the microwave demand its own circuit?
Respond: A microwave should, ideally, take it'southward own circuit. It is not absolutely necessary, simply you should exist prepared to watch and not overload the excursion. A microwave, an electric skillet and a coffeepot, for example, volition probable pop the breaker.
Question: Our existing hood fan does not vent to the exterior. So I demand ductwork to the outside for a proper install?
Respond: Merely if you lot want to vent the range fumes and steam outside. Nearly if non all microwaves come with the ability to either vent outside through a duct or to filter it and blow back inside.
Question: Are there microwaves that install on the wall just?
Respond: As far as I know, no. While it would be possible to blueprint such a system it would certainly require additional wall force; sheetrock lone would never hold a microwave oven and information technology's contents.
Question: Do you accept to install an outlet or tin can yous hardwire a microwave to the wall? I can't seem to detect the answer in the codes.
Answer: I would say that would come downwardly to your local laws and inspector. Non all kitchen equipment has an outlet - most dishwashers are hardwired, for example, as are range fans. Simply if the wire is there, it isn't hard to install an outlet, even just on inside the upper cabinet. I would certainly do it unless at that place is a very proficient reason non to.
Question: Are most cabinets sturdy enough for a Hood microwave?
Answer: Yeah. Considering how much can be put in a cabinet, and how much is typically put into cabinets loftier over a range, there should never be a problem.
Plus, of course, the wall is carrying a good bargain of the weight. Tipping one into identify and screwing information technology to the cabinet takes some attempt, simply a lot of the reason is bulkiness and awkwardness. The actual weight of the chiffonier is not great.
Question: Is the existing electric the correct voltage for the microwave? Are typical exhaust fans less?
Answer: The typical voltage for both is the 110 Volts found throughout the house.
Question: Could you explain how these instructions for installing and over-the-range microwave piece of work? I'grand certain that the circuit amperage used for the vent hood you replaced can't power the microwave. The microwave needs to be on 20amp circuit. Most hoods were on less and tied into other kitchen circuits, like ceiling lights. Exercise your breakers pop?
Reply: You are correct in that a microwave needs a large excursion, such as the 20 amp circuits that the electrical code requires for kitchen outlets. And y'all are likewise correct that mine was tied into just such an outlet. Most range fans will be wired that way; the only other options are to tie it into some other circuit or run a defended circuit just for the fan.
In my case, the microwave, toaster, coffee pot and electric griddle all ended up on the same excursion - mine is an older domicile without a lot of circuits. Running 3 of those at the same time does popular the billow, but whatsoever two, including the microwave, is fine, and that would be pretty typical.
Question: What is the required summit from stovetop to bottom of the microwave?
Answer: The microwave should be no less than 13" higher up the range. In improver, it should exist no more 54" above the floor - any less and it can be difficult for shorter people to employ.
Question: If at that place is no wall behind the stove, are there brackets to attach to the cabinets to install an over-the-range microwave?
Answer: None that I accept seen. Nor is the microwave capable of beingness hung there - it is designed for about of the weight to be on the wall. Near cabinets would not hold it anyway.
Question: We are installing the same make of over-the-range microwave. Even so, we can't go information technology level forepart to dorsum. Why?
Answer: I would suspect that the manufacturer changed the specs slightly on the exact placement of the supports on the microwave. Or that some spacers under the cabinet have fallen off unnoticed.
Either way, the likely solution is to add a small spacer under the chiffonier if the microwave is tipped up in the front. If it is already too high the subclass on the wall will have to be moved.
© 2022 Dan Harmon
Dan Harmon (author) from Boise, Idaho on December 17, 2022:
It shouldn't - it is made to be installed in that position. A bigger issue will be adding more than holes in the wall behind and the cabinet above - eventually, with multiple installs, these areas could lose the force necessary to support the microwave. That's unlikely with only two installs, though.
Tina on December 17, 2022:
Nosotros are going to replace our over the stove microwave convection unit. Thursday microwave I picked out is deeper than the nowadays one past a couple of inches. Volition this create whatsoever issues with the cooktop?
Dan Harmon (author) from Boise, Idaho on January twenty, 2022:
Connie: Yous take two problems here. You are wanting to motility the microwave only one/4", to a 3" gap on both sides. It may exist possible to slide it on the backing, but information technology may not, either, and require that the bankroll exist moved that ane/4". Information technology is unlikely that putting lag bolts (or large screws) merely 1/4" from existing holes will give enough support, even assuming it wasn't put where it was in guild to take studs to put the screws into.
Simply beyond that, you will accept to overstate the screw holes in the cabinet higher up. If there are blocks used to support the microwave, they can exist moved and the existing holes re-used, but information technology volition require a larger hole in the chiffonier itself. If there are no blocks used to distribute the weight in the cabinet you will have to supply some.
Promise that helps.
Connie Clawson on Jan 20, 2022:
My lg microwave was not centered correctly in a 36 nice space to a higher place my thirty inch stovetop causing a gap of 2 3/four inch on one side and three one/four gap on the other side. Was supposed to have a 3 inch cabinet filler on both sides. Tin can the microwave be slid over a niggling to accommodate this or volition it have to be removed and reinstalled. And what about the toggle bolts.
Dan Harmon (author) from Boise, Idaho on Apr 28, 2022:
Interesting question. Information technology must spike behind and in a higher place, and to material strong enough to hold it up. One must be able to get inside any "bulkhead" in a higher place and provide strong supports, although the wall behind needs only something along the lines of sheetrock. Given those requirements can be met, though, it shouldn't be too difficult - at worst open up upwardly the structure to a higher place or construct something, and so cover the opening later on calculation structural back up.
P Donohue on Apr 28, 2022:
Whatever ideas on how to install oven summit microwave if there isn't a cabinet but bulkhead instead?
Dan Harmon (writer) from Boise, Idaho on April 27, 2022:
I have seen whatever that shallow. Amazon lists several at or just over 15" deep, but that's about information technology. I suspect it will exist very hard to find (or impossible) because that volition sit information technology quite a ways back from the front end of the range and brand it hard to load and empty.
thiele on April 27, 2022:
I have a questions/ any idea where I can get an over the stove microwave that is only xiv" deep, thank you
Dan Harmon (writer) from Boise, Idaho on January 06, 2022:
Coincidentally, I very recently did just that. The terminal microwave I installed lasted just ane yr and 5 days. Five days by the warranty period.
A new one was purchased, of a different brand, and installed. The brackets were radically different - there was no chance that the one-time bracket would fit the new microwave.
Even if I had purchased the aforementioned manufacturer, I doubt that the bracket would have fit. The same model - maybe, but even that is in doubt.
Plan on removing and replacing that old bracket. If you don't have to, well and expert, but you should be prepared to practise then.
amkjud on January 06, 2022:
if i am replacing an older microwave, will the hanging subclass exist the same or will i demand to supplant it?
Dan Harmon (author) from Boise, Idaho on September 23, 2022:
Thanks for the vote of confidence; I try to give instructions for someone that has never done the chore before.
saleheensblog from Dhaka,Bangladesh on Nov 10, 2022:
useful info, voted upwardly

Source: https://dengarden.com/appliances/how-to-install-installing-an-over-the-range-microwave
Posted by: patewitilly.blogspot.com
0 Response to "How Hard Is It To Install Over The Range Microwave"
Post a Comment